
The Ultimate Guide to DIY Home Gym Equipment: Budget Builds, Cable Systems & Storage Hacks
Commercial gym equipment has never been more expensive. A single branded squat rack can cost more than a year of gym membership, and a cable machine can run into four figures. It is no surprise that budget-conscious lifters are picking up saws and drills instead of credit cards. But building your own gear only pays off if you balance the savings against one non-negotiable: structural safety.
This guide walks you through the DIY home gym equipment worth building (a heavy-duty dumbbell rack, a low-cost cable pulley system, and a solid wooden flat bench) and the builds you should honestly skip. For every heavy build, you will also get a commercial alternative, so you can decide whether fabrication is worth your time and risk. If you are still planning the room itself, start with our home gym layout design ideas before you buy a single board.
Table of Contents
The Economics & Safety Reality of a Homemade Gym
Before you cut lumber, be clear about what you are signing up for. A homemade gym can be a great deal, or an expensive mistake, depending on what you build.
The Pros of Building Your Own
- Massive upfront savings: Lumber, hardware, and pulleys often cost a fraction of equivalent commercial equipment, especially for storage and simple benches.
- Custom dimensions: You can size a rack or bench for a low garage ceiling, an awkward spare-room corner, or a specific body height.
- Satisfaction and skill-building: Lifting on something you built yourself is genuinely rewarding, and the skills carry over to future projects.
The Cons You Should Weigh
- Time investment: A weekend project often becomes two weekends once you factor in shopping, measuring, re-cutting, and finishing.
- Tool requirements: At minimum you need a saw, a drill/driver, a socket or wrench set, a tape measure, a square, and clamps.
- No warranty or testing: Commercial gear is load-tested and backed by the manufacturer. Your build is only as good as your materials and workmanship.
The Golden Safety Rule
Never compromise on load-bearing overhead structures. A makeshift wood squat rack holding 300+ lbs over your neck, with nothing between you and a failed joint, is the single riskiest DIY in fitness. Storage racks, handles, and simple benches are forgiving. Anything that catches a falling barbell is not.
Keep these principles in mind for every build in this guide:
- Use structural-grade, kiln-dried lumber, free of large knots, splits, and warping.
- Use Grade 8 bolts (or equivalent high-tensile hardware) with washers and lock nuts for any structural connection, never drywall screws.
- Know the limits of your materials, and design with a wide margin of safety above the heaviest load you plan to use.
- Inspect before every session. Look for cracks, loosened bolts, and frayed cable. Retire anything questionable immediately.
If you are working with a tight budget but want the safest possible foundation, our guide to garage gym ideas on a budget shows where to spend and where to save.
DIY Dumbbell Rack & Plate Storage
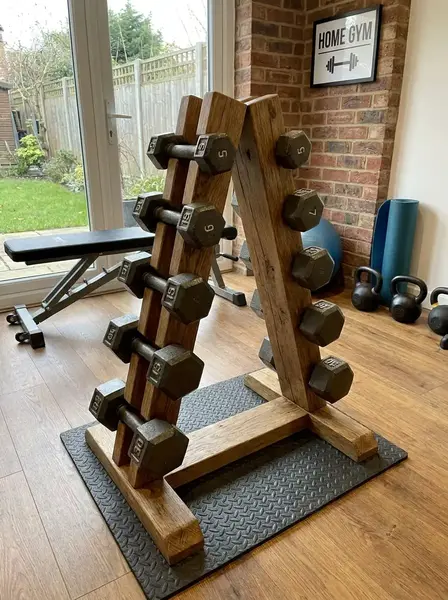
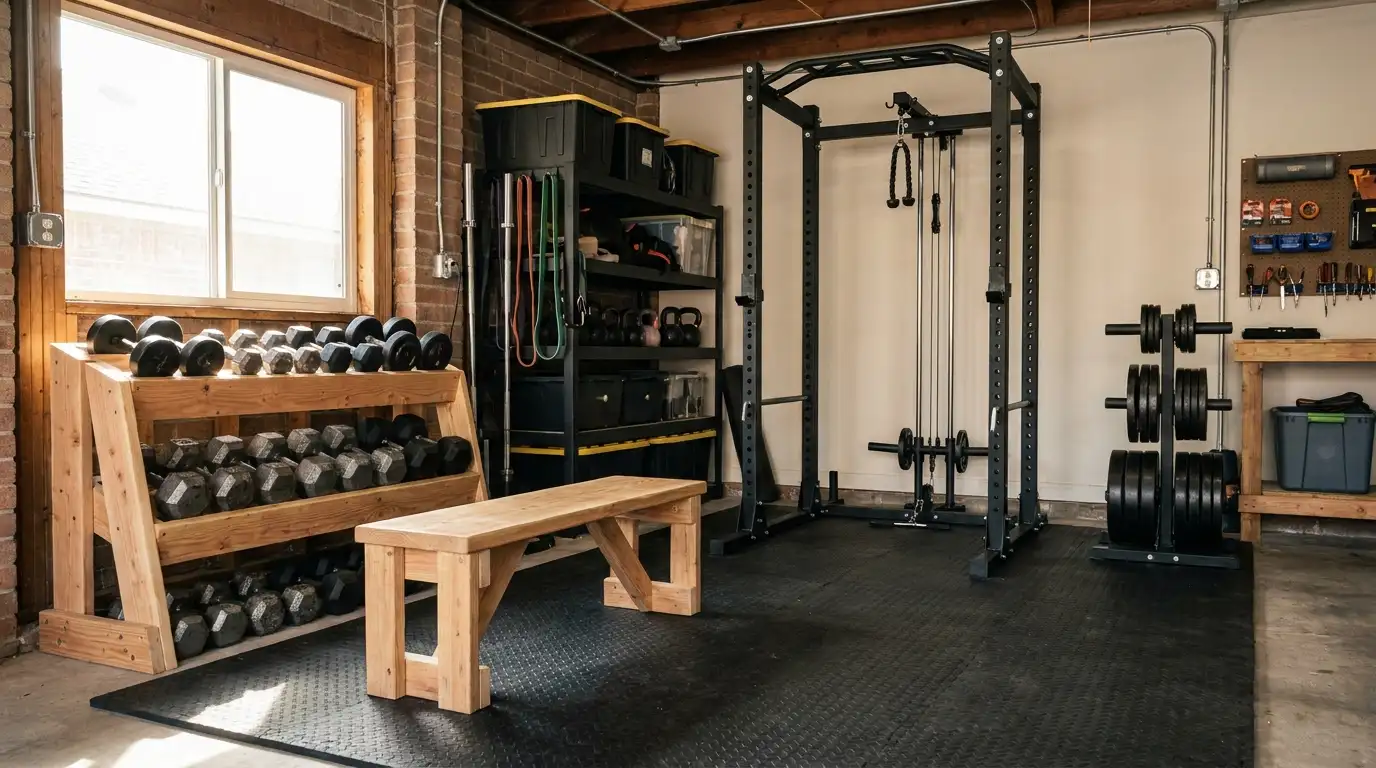
Storage is the best place to start DIY home gym equipment. Dumbbells are heavy, but a rack only has to hold weight at rest, so the risk is far lower than any lifting station. A tiered A-frame or horizontal shelf rack is a straightforward build for beginners.
The Build
A heavy-duty 2×4 tiered rack keeps dumbbells off the floor, protects your flooring, and makes it easy to grab the weight you need. You can build it as an A-frame (two sloped sides with horizontal shelves) or as a simple horizontal shelf rack with two or three tiers. The A-frame uses less floor space and spreads the load, while the shelf style is simpler to cut and assemble.
Materials Needed
- Kiln-dried 2×4 studs: straight, dry, and free of large knots
- 3-inch wood screws: structural or deck-grade, not drywall screws
- Wood glue: exterior or construction grade for every joint
- Optional rubber matting or shelf liner: to cushion the dumbbell handles and cut noise
- Sandpaper and sealant or paint: to prevent splinters and moisture damage
Tools needed: miter or hand saw, drill/driver, tape measure, speed square, clamps, and a level.
Step-by-Step Build Overview
- Plan your dimensions. Measure your largest dumbbell and leave a few inches of clearance for each shelf. Keep shelf spans short, in the range of 24 inches or less between supports, so the wood does not sag over time.
- Cut your pieces. For an A-frame, cut the angled leg ends so they sit flat on the floor and flat against the shelf supports. Cut all matching pieces together so they are identical.
- Build the base first. Secure the lowest tier and base as the load-bearing foundation. Apply glue to each joint, clamp, then drive screws in pairs to resist twisting.
- Add the upper tiers. Work from the bottom up, checking level and square at each step. Put the heaviest dumbbells on the lowest shelf when you load it.
- Finish the surface. Sand every edge, then add rubber matting to each shelf to protect the handles.
- Test before trusting. Load the rack gradually. Start with light dumbbells, check for flex and creaking, and only then move to your heaviest pairs. Stand clear while testing.
The most common failure is a heavy dumbbell load concentrated on a long, unsupported span. If you see visible bowing, add a center support or shorten the span before using it.
If floor space is tight, you may prefer something other than a floor rack. Check our guide to storage hacks for small home workout areas for wall-mounted and vertical options.
Homemade Gym Cable Machine (DIY Pulley System)
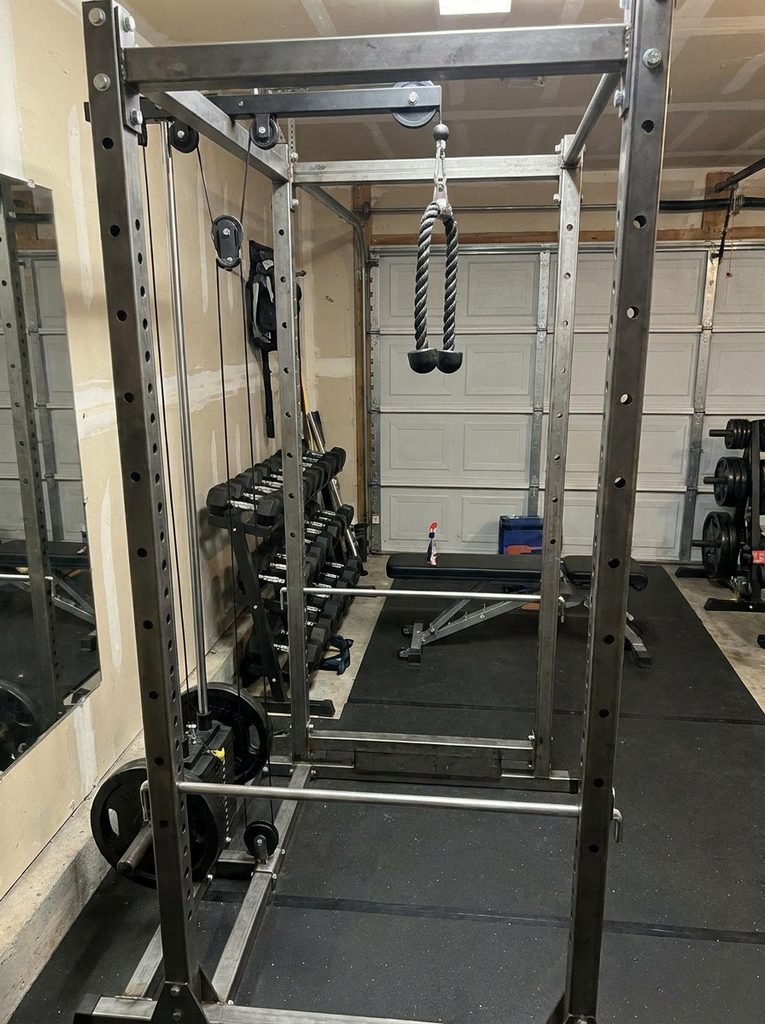
A full commercial cable machine is out of reach for most home gyms. A DIY pulley system, rigged to something you already own, gets you a surprising amount of function: lat pulldowns, low rows, triceps pushdowns, and more.
The Build
The goal is a low-cost lat pulldown and low row setup that uses an existing pull-up bar or power rack as the anchor. Because the anchor point carries your entire working load, it must be a structure that is already rated and stable. Do not hang a pulley from a ceiling joist, a doorframe, or any structure you cannot verify.
A rack-based system is the safer route, and our power rack home gym guide covers sturdy options. If you are working with a mounted bar, our pull-up bar exercises for small spaces article explains what a properly installed bar can handle.
Materials Needed
- Heavy-duty swivel pulley wheels: rated for well beyond your intended working load
- 1/8-inch coated steel wire rope: check the manufacturer’s rated breaking strength and working load limit
- Wire rope clips or clamps: sized for your rope diameter, installed per the manufacturer’s instructions
- Loading pin: a sturdy steel pin sized for standard Olympic plates
- Carabiners or quick links: load-rated, with locking gates
- Nylon strap handle or attachment: for the lat bar, row handle, or rope grip
- Thimbles: to protect the rope where it loops
Step-by-Step Assembly
- Choose your anchor. Identify a structural point on your rack or pull-up bar, and confirm it is rated for the load it will carry. Remember that a pulley can multiply or redirect force, so size your hardware with a generous margin.
- Rig the overhead pulley. Attach the pulley to the anchor with load-rated hardware. Make sure it swivels freely and that the rope tracks in the groove without rubbing on edges.
- Thread and terminate the cable. Run the rope through the pulley, form each end into a loop around a thimble, and secure it with clips in the correct orientation and spacing. Tighten evenly and re-check after the first few uses, since new rope can settle.
- Attach the loading pin and plates. Connect the pin end of the cable to a plate-loading pin that holds standard Olympic plates securely. Keep the plate stack low to the ground and confined, so it cannot swing or tip.
- Set up smooth travel. The cable should move in a straight, unobstructed line. Add a second pulley if you need to change direction, and keep the plate path clear of your body and walls.
- Test with light weight. Begin with a small load, work through full range of motion, and inspect every clip, knot, and carabiner before adding weight.
Safety notes: Wire rope clips are a common failure point when installed backwards or loosely. Inspect the rope before each session for fraying, kinks, or broken strands, and replace it at the first sign of wear. Never exceed the lowest-rated component in the chain.
The Commercial Alternative
If rigging cable systems feels like more risk than you want, a pre-engineered cable attachment or all-in-one station removes the guesswork. Start with a stable power rack as the foundation, then add tested pulley accessories designed for it.
DIY vs. Buy: Homemade Gym Bench
Benches are where many DIY builders get overconfident. The answer depends on the type of bench.
The Reality Check
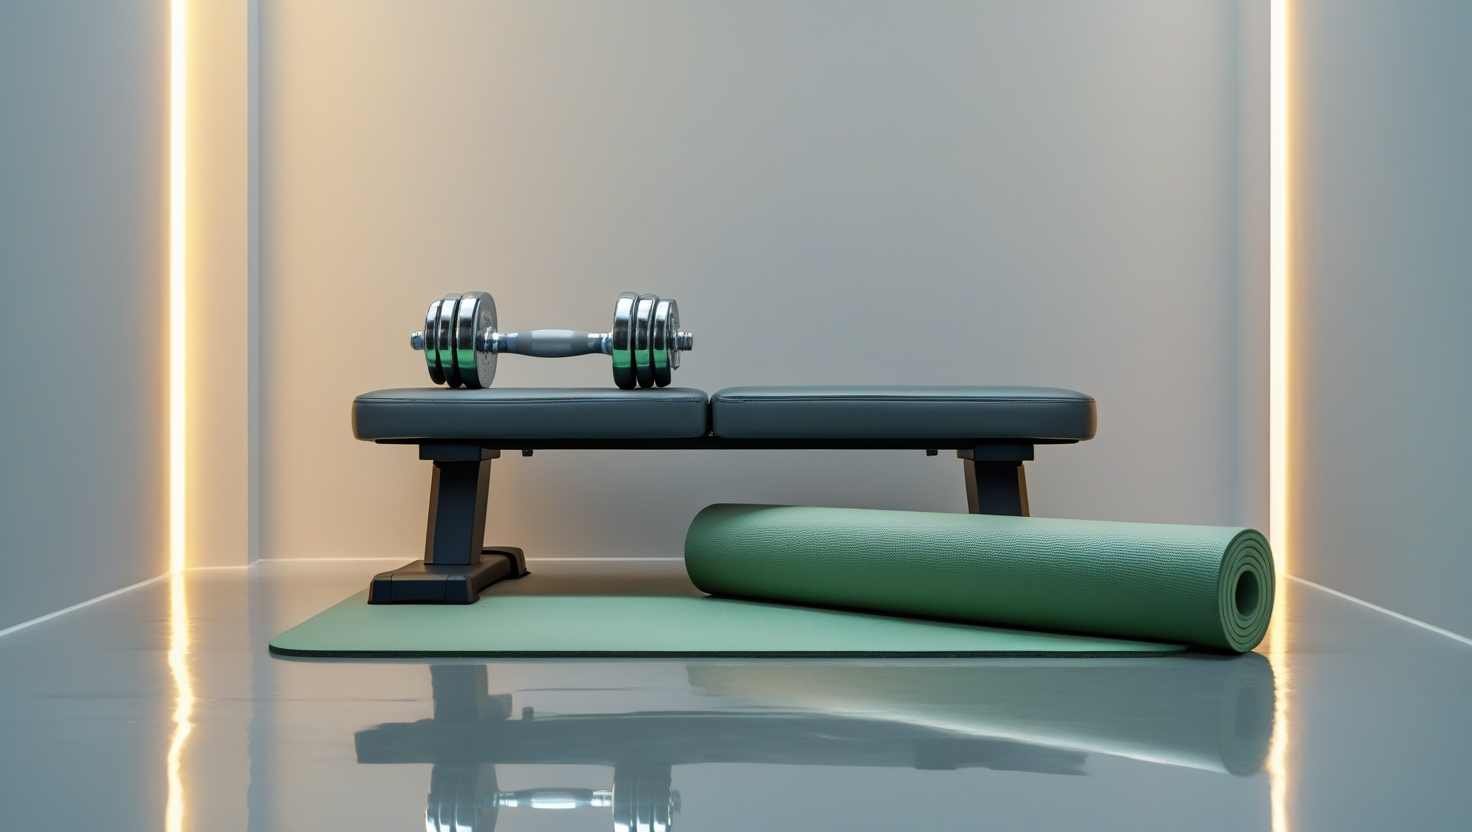
Can you build a wooden flat bench? Yes. A fixed flat bench has no moving parts, and the structure is simple enough to build well with the right materials.
Should you build a complex adjustable incline bench from lumber? Usually no. Adjustable benches introduce hinges, ratchets, pinch points, and moving joints, and each one is a place where mechanical failure can happen under a heavy bench press. A failed back pad or collapsing support with a loaded bar overhead can cause serious injury.
How to Build a Safe Wooden Flat Bench
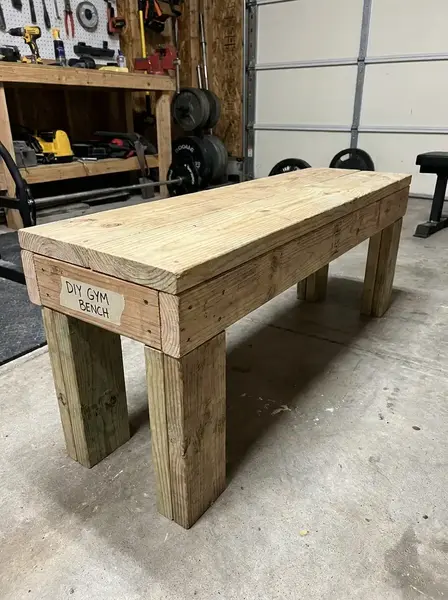
A good flat bench is wide enough to be stable, firm enough to support your back, and low enough to keep your feet planted. A typical target is a length of about 48 inches, a width of 10 to 12 inches, and a pad height of around 17 inches, but adjust for your own body.
Materials Needed
- 4×4 posts: kiln-dried, for the legs
- 3/4-inch plywood: a good-quality sheet for the top
- 2×4 or 2×6 cross-supports: to brace the legs and carry the top
- Grade 8 bolts, washers, and lock nuts (or carriage bolts): for leg-to-frame connections
- High-density foam: for firm padding
- Vinyl upholstery: marine-grade, if you want better durability
- Staple gun and heavy-duty staples: to secure the cover
- Wood glue and sandpaper
Step-by-Step Overview
- Cut the legs and supports. Cut four equal-length 4×4 posts and build a rectangular frame with cross-supports so the legs cannot rack or twist.
- Join with bolts, not just screws. Through-bolt the leg-to-frame connections with washers and lock nuts. Add glue to the joints for extra stiffness.
- Brace for stability. Add diagonal or lower stretchers so the bench resists side-to-side rocking. A wide stance is safer than a narrow one.
- Attach the top. Glue and screw the plywood to the frame, with fasteners countersunk so nothing protrudes through the pad.
- Pad and upholster. Layer high-density foam over the plywood, stretch the vinyl over it, and staple underneath. Round the plywood edges first so the cover does not tear.
- Test. Sit and lie on it, then add load gradually. Check for wobble, creaking, or any shift before you press with a bar.
A wooden flat bench is meant to be used with a rack that has proper safeties, or for dumbbell work. Never press a loaded barbell from a bench without catchers.
The Commercial Alternative Box
Want multiple angles without the risk? If you want flat, incline, and decline positions that you can trust, a purpose-built bench is the smarter buy. Read our YOLEO adjustable weight bench review to see how a budget-friendly adjustable bench performs, and browse our garage gym ideas on a budget for more value-driven picks.
Homemade Gym Rack & Squat Stand Considerations
This is the section where we recommend the most caution. A rack is the equipment that protects you when a lift goes wrong, so it must be at least as strong as the load you place on it, with a wide margin.
The Reality Check: Wall-Mounted vs. Freestanding Timber Racks
Wall-mounted racks transfer load into your wall studs. That makes the wall, the fasteners, and the framing behind the drywall part of the structure. Structural lag bolts must reach solid framing, and the wall itself must be able to take the leverage forces involved.
Freestanding timber racks avoid wall dependence, but they need serious bracing. Wood has less stiffness than steel for the same footprint, so a safe design needs bulky uprights, gussets, cross-bracing, and wide bases, plus high-tensile bolts at every load joint. By the time you add all of that, a wooden rack is heavy, bulky, and time-consuming to build, and still lacks the engineering and testing of a factory steel unit.
The forces on a squat rack are also not purely vertical. Racking, un-racking, bar drops, and uneven loading all create sideways and twisting loads. That is why many lifters who start with a wooden stand eventually switch to steel.
Commercial Pivot: Raw Lumber vs. Tested Steel
Add up the real cost of a timber rack: quality lumber, structural bolts, brackets, tools, and many hours of labor. Then compare it with a factory-tested steel rig. The price gap is often much smaller than it first appears, and you get a rated structure, predictable hole spacing, and safety pins or arms designed for the job.
If space is your main concern, a folding squat rack gives you a steel, tested option that folds out of the way. If you want maximum stability and room to grow, our power rack home gym guide covers full-size racks.
If you do want to try a DIY rack anyway, keep it for lighter work and warm-ups, and never use it for maximal attempts without safety catchers you fully trust.
Essential Finishing Touches for a DIY Space
A DIY build is only as good as the space around it. A few finishing choices make your homemade gym safer and more durable.
Flooring & Protection
Proper rubber mats are non-negotiable, even in a budget DIY setup. They protect your concrete or subfloor from dropped weights, reduce noise and vibration, and give you a stable, non-slip surface. Your wooden dumbbell rack and bench will also last longer when they are not sitting directly on a damp garage slab. See our guide to the best home gym flooring mats for durable, affordable options.
Accessories You Shouldn’t DIY
Some items are cheaper, safer, and better made when you simply buy them:
- Resistance bands: homemade versions can snap without warning, and quality bands are inexpensive
- Barbell collars: a collar that slips can unbalance a bar, so buy tested collars
- Calibrated weights: precise plates and dumbbells matter for tracking progress, and homemade weights are rarely accurate
- Safety catchers and J-hooks: these are load-critical parts of your rack and deserve engineered steel
If you want small, useful upgrades that are worth the money, our slant boards for squats and calf stretches guide is a good place to start.
DIY Home Gym Equipment FAQ
Is building DIY home gym equipment actually cheaper than buying budget commercial gear?
Often yes for storage racks and simple flat benches, where lumber and hardware cost far less than equivalent commercial items. For squat racks and adjustable benches, the savings shrink once you add structural hardware, tools, and time, and you lose the warranty and tested load ratings.
How much weight can a DIY 2×4 dumbbell rack safely hold?
It depends on your design, joints, and span. A well-built tiered rack with short spans, glued and screwed joints, and a solid base can hold a substantial dumbbell set, but there is no universal rating. Test it gradually, load the bottom shelf first, and add supports if you see bowing.
What hardware is required to build a safe DIY cable pulley system?
You need load-rated swivel pulleys, coated steel wire rope with a known working load, correctly sized wire rope clips and thimbles, locking carabiners or quick links, and a solid pin for plates. Anchor everything to a verified structure like a power rack, and size every part well above your working load.
When is it dangerous to use homemade gym equipment?
It becomes dangerous when it catches or supports a heavy load overhead or over your body: squat racks, bench press stands, and adjustable benches. It is also risky when materials are damaged, hardware is loose, or you cannot verify the load rating. When in doubt, buy tested steel.
Final Thoughts: Build Smart, Lift Safe
DIY home gym equipment is a rewarding way to stretch your budget, as long as you build the right things. Dumbbell racks, flat benches, and carefully rigged pulley systems are great projects. Racks and complex benches are where tested commercial gear earns its price. Start with storage, add a stable foundation, and upgrade your heavy-duty pieces over time. Whatever you build, inspect it often, test it gradually, and never trade safety for savings.